Generating a Machine Image
Once an appliance template has been created, you can generate a machine image that packages the stack to run on a particular virtual, cloud, container or physical environment. For a complete list of supported machine image formats, refer to Supported Machine Image Types.
- To generate a machine image:
- Go to the
Appstab. - Select the appliance from the
Appliance Library. - Click on the
generatebutton at the top right to display all possible image formats which can be generated. The formats are organized by type: Cloud, Container, Virtual, Physical. - Choose the image format you would like to generate. For a Docker image, refer to Generating a Docker Image.
Note
For Windows appliances, if you are generating an image for VMware vCenter make sure that your generated image’s hardware version is the most up to date for the ESXi host that you are using for publish. For more information please refer to VMWare recommentations
You will see a recap of the image you are about to generate.
Note
If you want to ignore dependency checking during image generation (for example because you have knowingly removed a package dependency that is not required in your environment), then you check the option
ignore dependency checking warnings. Note that this is an advanced option and should not be used systematically.Warning
If your software bundle is limited to a certain target format and you generate an image in another format, your appliance will be generated but the software bundle will not be part of the final image. A note indicating this will appear when you select to generate the machine image, as in the following image.
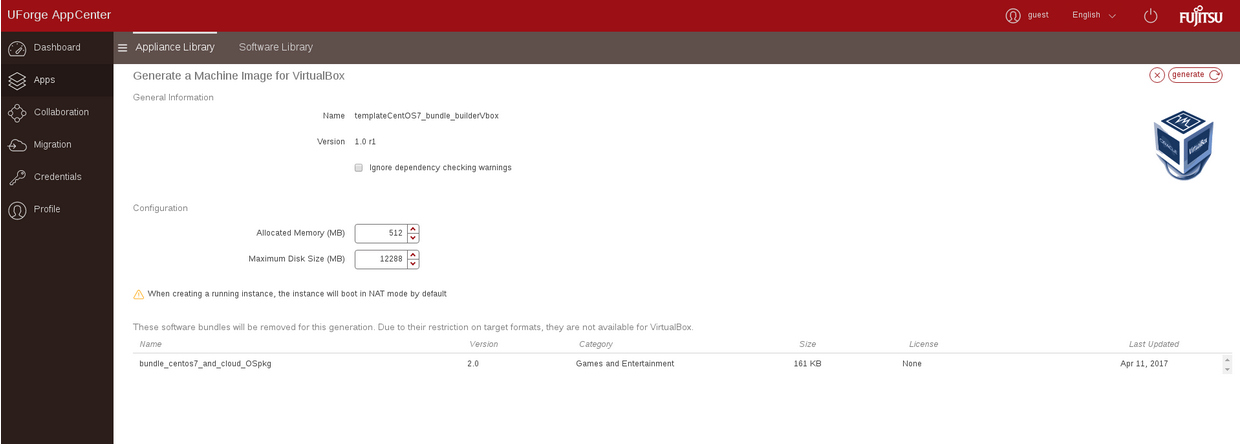
You can set the disk size, then click the
generatebutton to launch a generation in UForge for this appliance template.Note
Depending on the packages you install and the size of your software, make sure that the disk size is large enough to accommodate the software to be installed. For Windows-based operating systems, it is advised to have a disk size of at least
14GBfor core versions, and at least20GBfor full versions.
- Go to the
The generation will take a few minutes to complete (depending on the number of packages in the appliance template and the disk size chosen). The generation progress is shown.
Note
Some services are disabled or enabled depending on the target machine image being created (refer to Changes to Service State Based on Target).
Once the generation is complete, you can download the image locally, or for certain cloud formats register the machine image directly to the target environment using your cloud credentials.
You will note that a package uforge-install-config is injected in the generated image. This file is responsible for:
- launching the dialog for the install profile configurations which are not automatic (keyboard, root password, licenses, time zone, static IP)
- executing the installation bootscript of the template
If the template is configured to be fully automatic in the
Install Profileand has no bootscript that is supposed to run at every boot, the uforge-install-config package and associated/etc/UShareSoftdirectory can be removed safely.
However, it is preferable to leave this file.
Generating a Docker Image
- To generate a machine image:
Go to the
Appstab.Select the appliance from the
Appliance Library.Click on the
generatebutton at the top right to display all possible image formats which can be generated.Choose
Container, thenDockerimage format.You can set the disk size, then click the
generatebutton to launch a generation in UForge for this appliance template. The following pop-up will be displayed once the generation ends on the summary view.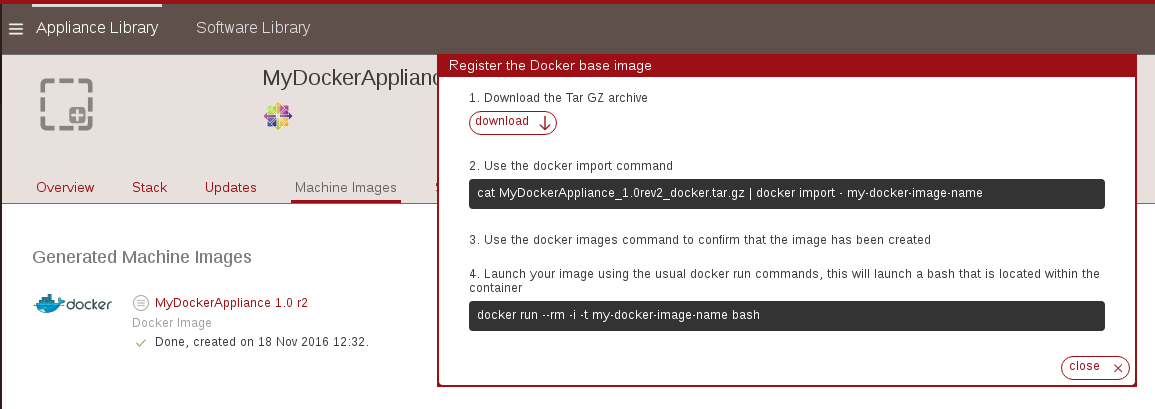
- As indicated in the pop-up, you need to click
downloadto download the tar.gz. - Run the appropriate docker import command to create the image. The appliance and docker image name will depend on the name you have given them.
- You should now be able to see the Docker image in your library.
Changes to Service State Based on Target
When generating a machine image from a scan, certain services are disabled or enabled depending on the target machine image being created. The following changes are common to all formats:
libvirtddisabledsshdenabled- rewrite grub configuration and
initramfs/initrd
If after all service modification, networking services are not enabled, then NetworkManager is enabled if the package is present, otherwise network is enabled.
Note
NetworkManager is the name used by some operating systems which is the equivalent to network-manager. The name network is used by some operating systems which is the equivalent to networking.
EC2 AMI Image
haldisabledhaddaemondisablednetworkenabledip6tablesdisablediptablesdisabled
OpenStack Image
haldisabledhaddaemondisablednetworkenabledip6tablesdisablediptablesdisabled
Microsoft Azure Image
networkmanagerdisablednetworkenabled