Creating an Appliance Template
You can create either Linux-based or Windows-based appliance templates. The steps differ slightly. Please refer to the appropriate section below.
Creating a Linux-based Appliance
To create a new appliance in your private workspace:
Select
VM Buildericon on the left.On the
Appliance Librarypage, click oncreatein the top right.Enter the
NameandVersionof the appliance.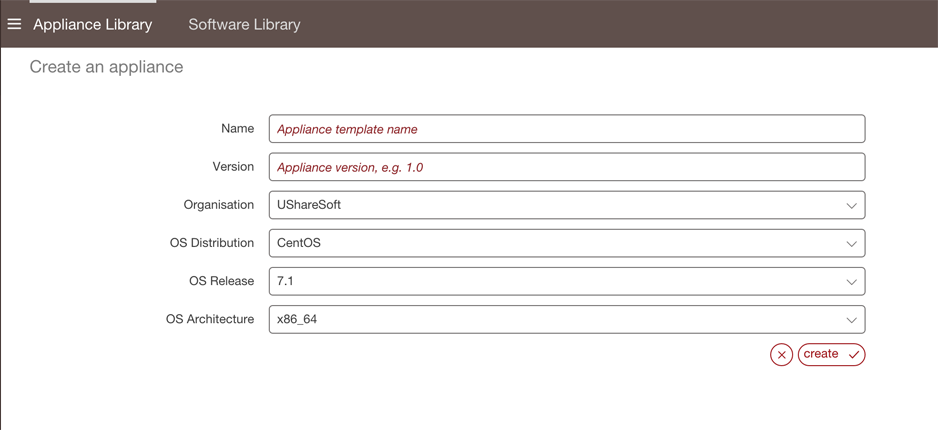
From the drop-down menus, select the operating system (distribution, release and architecture).
Click the
createbutton. This creates a skeleton of an appliance template in the platform which you can now customize with operating system packages, middleware and application software.You should now see the appliance overview page. You can add a description to your appliance (optional) and a logo (optional). The logo must be in .jpg, .jpeg or .png format.
An OS profile is mandatory. See Adding a New OS Profile. However, you can leave the appliance at this point and edit it later.
If you have made any modifications, click the checkmark to save.
Creating a Windows-based Appliance
To create a Windows Appliance:
From the VM Builder tab, select
create.Enter the appliance name.
Choose
Windowsfrom the OS Distribution drop down menu.Click
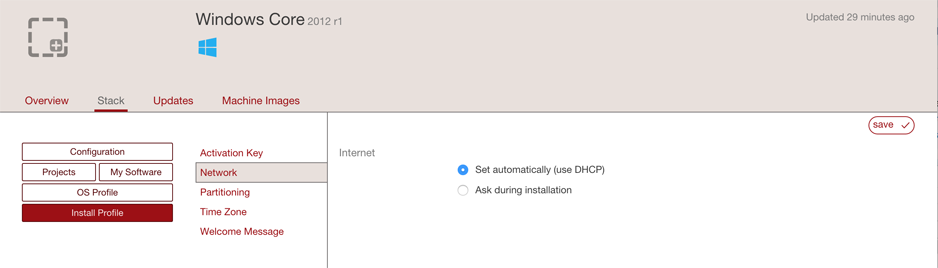
create.From the
Stackpage, select the OS Profile. Core or Full may be possible available releases you can select, but this depends on your platform. Clicksave.Note
Once you have chosen the OS Profile, you cannot add any packages or run updates. The OS Profile is static. Once created, if you select OS Profile, you will only be able to view the details of the profile you selected.
Note
If you want to revert the chosen OS Profile and restart this step click
deleteandconfirm.Set the Install profile and click
Save.Note
Unlike Linux, the following cannot be set for Windows appliances: Keyboard, Root user, User & Groups, Kernel Parameters and Services (Firewall).
Optionally, you can set the Activation Key as part of the Install Profile. If it is not entered in the Install Profile, the default key will be used for a 30-day trial period once the appliance is booted.
- Optionally you can add partitions.
- Click on
Partitioningand selectAdvanced Partitioning.- Click on the green + sign at the top.
- You can modify the name and partitions type
- Select the filesystem to ntfs and mount point to D: (or such).
- Enter the size. The install disk should be 12 Gb for core versions and not less than 32Gb for the full version
- Check the box in the Grow column if you want the partition to be growable.
- Click
save.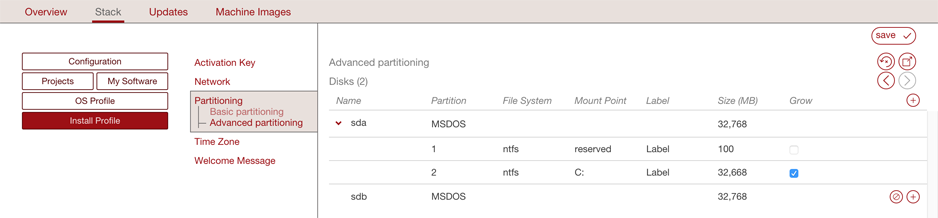
Add software bundles from the Project or MySoftware pages.
Warning
Software bundles included in MySoftware and Project will be put on the image disk but the UForge generation tool WILL NOT install them even if these are executable/installers files (.exe, .msi, etc.). It is up to the end user to manually complete the installation of the software bundles.
For Windows, .exe or .msi files can be given extra parameters. The parameters depend on the .exe or .msi file, and can be used for example for silent installation, providing extra configuration values, etc. See Adding a Boot Script for further information how this can be achieved.
Note
A binary called UShareInstallConfig is embedded at generation time, which helps the final user of the Appliance do the last-mile configuration.