Adding Custom Software Components
There are two ways to add 3rd party software components or your own software to an appliance template.
The first way is through the Project Catalog. This catalog is public to all the users on UForge and is maintained by the privileged users and administrators.
If the catalog does not contain the software component you are looking for, then you can upload the software into the My Software library. This is your own private software library, allowing you to upload any software into UForge and be able to add it to any of your appliance templates.
Adding Software from the Project Catalog
The following describes how to add MySQL and Apache to an appliance.
Select the appliance to modify and go to the
Stackpage.Click on the
Projectsin the toolbox. This displays the Project Catalog. The bottom table lists which projects have already been added to the appliance.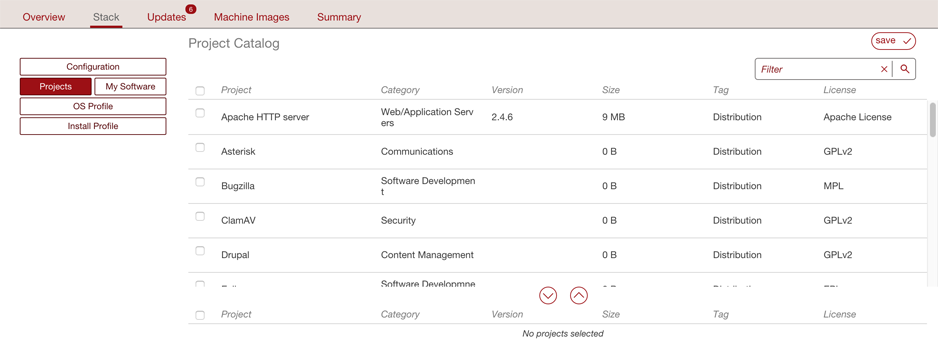
Select the projects, for example Apache and MySQL and click the down arrow button. You can scroll through the available projects or enter a search string to filter the list.
Click Save. These projects should now be displayed in the second table.

Adding Software from Your Software Library
You can add your own custom software either using the Software Library or by including boot scripts. My Software overlay files (for example /etc/profile.d/xxx.sh) will be run before bootscripts when the machine is booted.
The following is a list of supported file formats:
Linux only, note by default .rpm and .deb files will be installed at generation. This can be modified when you upload the files (see procedure below):
- .rpm (“rpm i” will be executed)
- .deb (“dpkg -i” will be executed)
- Windows only:
- .msi
- .exe
- Linux and Windows compatible:
- .tar.bz2
- .bz2
- .tar.gz
- .tgz.bz2
- .tgz
- .gz
- .tar
- .zip
- .tar.zip
To add custom software components to an appliance:
From the
Appstab, click onSoftware Libraryin the top left hand side of the UI. This opens your private Software Library.Click on the
add softwarein the top right hand side.You are now prompted for the name, version and maintainer of the software component you would like to add. You can also set a tag and category. Click
createto complete.The software
Overviewpage will now open. You can modify the name and version, and add a description.To upload the files, go to the
Filespage.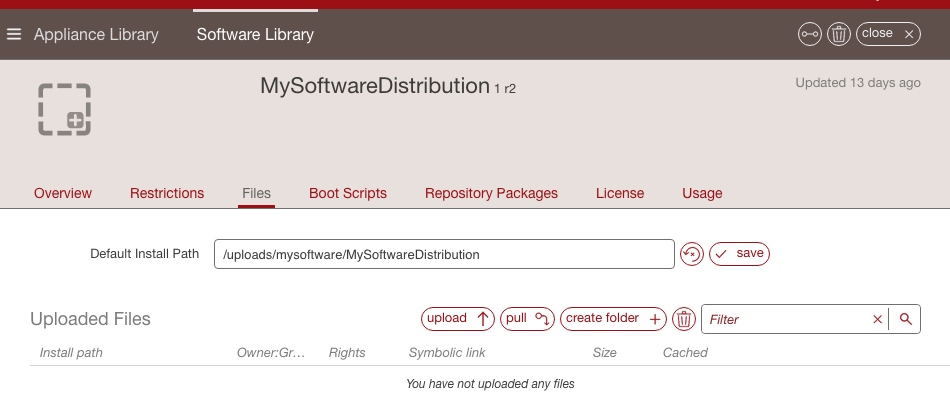
Note
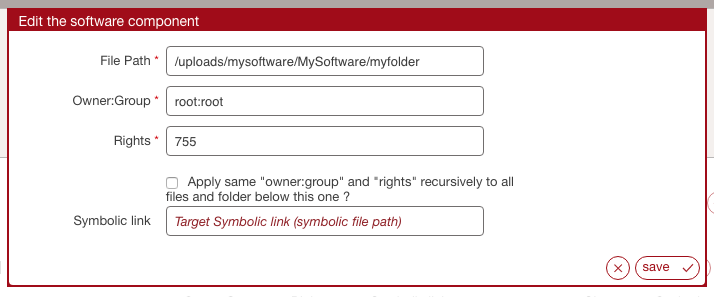
If you want to group a set of files, you can create a folder by clicking
create folder. Then enter a folder name and clickcreate folder. Now if you want to put files in this folder, click on the upload icon next to the folder name.If you create a folder, you can then click on the pencil icon to edit the file properties. Here you can select to apply the same owner and rights to all the files added to the folder.
- You can now upload the files as follows:
- Click
uploadto select the files you want to add and clickopen.- Click
fetchto set an archive location where the files should be retrieved. When using thefetchoption you can indicate a remote URL or artifact account (for information on artifact accounts, refer to Managing Your Artifact Accounts). You can also select to have the files uploaded to the UForge by checkinguse cache.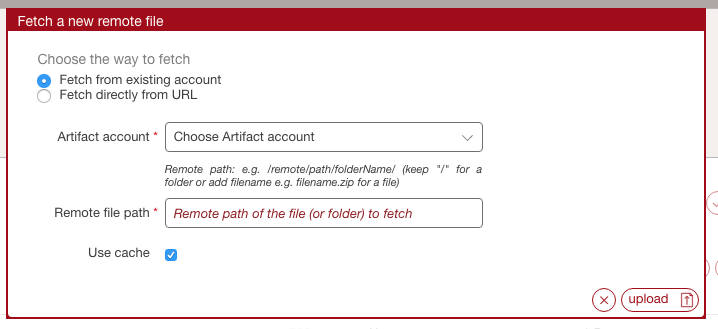
Optionally, you can modify the
default install paththat will be used. If you have modified the name of your appliance, it may not be reflected in the install path.
- By default
.deband.rpmfiles will be installed at generation time. Optionally you can edit the settings for those files:
- Click on the pencil on the right hand side of your uploaded file.
- Un-select
Install this native package as part of the generation.- Click the check mark to save your changes.
In this case, the
.debor.rpmarchive file will be in the directory but will not be installed at generation time.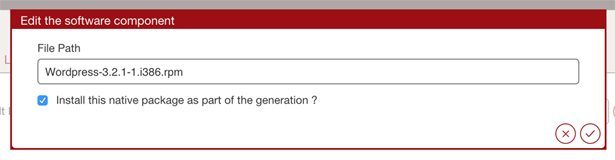
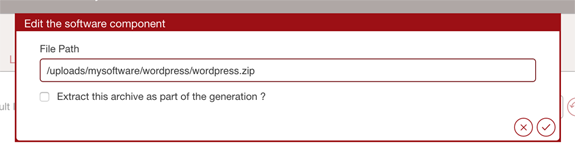
- Optionally, you can select to unzip archives as part of the generation. To do so:
Click on the pencil on the right hand side of your uploaded file.
You can then edit the install path and select if it should be extracted.
Click the check mark to save your changes.
From the
Restrictionpage, you can set the distributions with which your software is compatible. By default, all the distributions listed in the bottom table are compatible. If you want to remove a distribution from the list, select and click the up arrow andsave.Note
If you remove all the distribution compatibility, the software will not be visible for any appliances.
From the
Repository Packagespage, you can set the packages with which your software is compatible. This page will only be visible if you have selected only one distribution. You can search for packages. Select and click the down arrow to add them. Clicksave.
- From the
Boot Scriptspage, upload any boot scripts you want to add to this software. You can either:
- Upload an existing boot script file by using the
uploadicon.- Create a new boot script by clicking
new.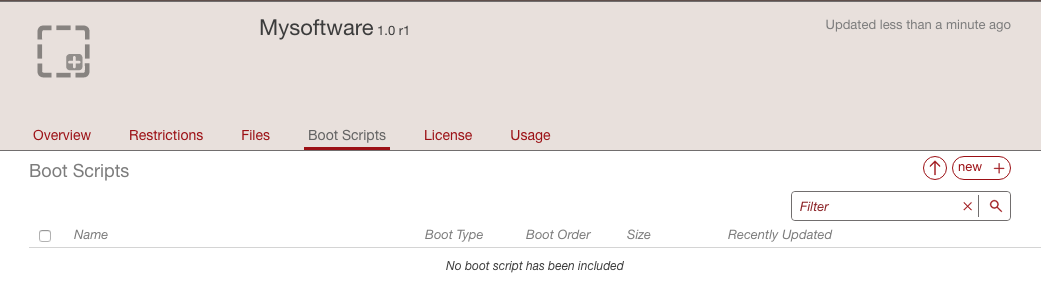
In both cases, you must select the type. If you select
first boot, then the boot script will be launched once, the first time the instance is launched. If you selectevery boot, then the boot script will be launched every time the instance is rebooted. You must also set the boot order.
From the
Licensespage, upload any licenses you want to add to this software. Clickupload, select your license and clicksave.Add the uploaded software component to the appliance. Click on the
Appliance Libraryto view your Appliance Library. Double-click on the appliance template you want to add the software to.Go to the
Stackpage and click on theMy Softwarebutton in the toolbox.
Select the software components you want to add and click the down arrow button.
Click
saveto add this software component to your appliance template.