Create an Appliance from a Scan
You can create an appliance template from a scan. This allows you to change and modify the contents of the machine that has been scanned. Once you create an appliance template, all packages and files that are known will be listed under OS profile, while “unknown” packages and files will be listed under MySoftware.
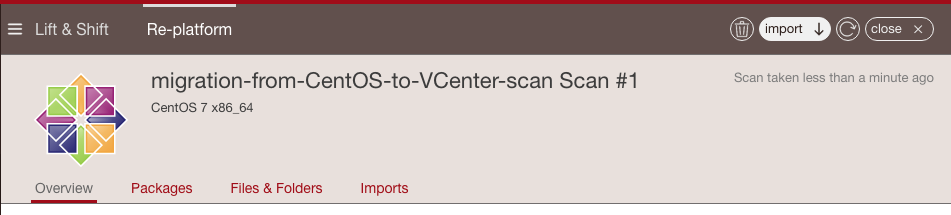
- To create an appliance template from a scan, from the
Re-platformtab on theMigrationspage: - Click on the scan from which you want to generate an image.
- Select the
importbutton (downward arrow) at the top right to create an appliance template from the scan. The following example is for Linux, but you can also import a Windows scan.
Note
If you have administrator rights, for a Windows scan you can choose to import as appliance or import scan as a golden image. For more information, refer to the Admin guide.
- Enter the appliance name and version.
- Click
import. The progress will be shown under theImportstab. Once complete you can find the appliance also under theAppstab, underImported Appliances.
You can now generate a machine image and share it, as you would any other appliance template. It is also possible to push it to a remote environment. The image is then ready to be launched in the new environment and the migration is finished.
Note
When you create a Windows appliance from scan, the applications and services will be visible under OS Profile on the Stack page.
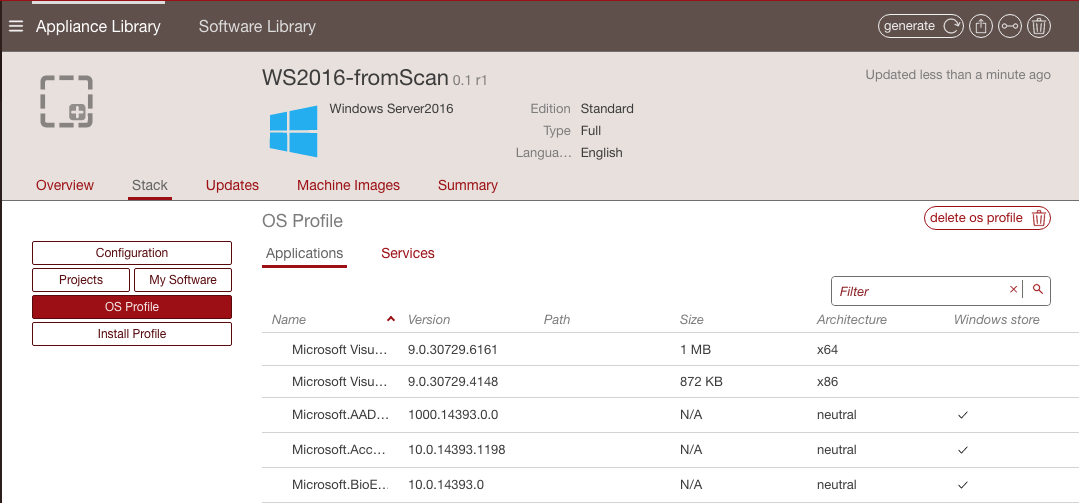
More importantly you can now change the contents of the original scanned system. If you go to the Apps tab, the new appliance template will be listed in the Imported Appliances section. Double-click on it to view the details or modify it.
Warning
Once you have created a Windows appliance using import from a scan, you will only be able to import this appliance to another UForge platform by removing some OS section fields. Refer to Updating a Windows Appliance Before Import.
Changing a Configuration with “No-Console” Features
This is typically the case when migrating to Azure. Azure does not have any console facility today during first boot of the instance. When you migrate a workload in black box, no install type questions are asked on first boot. This is due to:
- root password is copied
- SSH keys are copied
- partitioning table is preserved
- keyboard is preserved
- timezone is preserved
Access to the machine would typically be done via SSH.
White box migration provides more flexibility. As soon as you import a scan, which effectively creates an appliance template, you will have access to the Install Profile. This allows you to reset and change many of the “installation”/first boot parameters including prompting the end user to provide the information (for example: ask the end user to set the root password). Any prompt to the end user is normally displayed in the console. However if the user logs into the machine for the first time via SSH, these prompts are displayed in the SSH terminal and not the console.
Warning
If you decide to prompt the user for the root password, then an SSH key mechanism must already be determined (private key owned by the user and public key set in the Install Profile). Otherwise the user will be locked out of the system with no way to SSH into the machine as no password has been set yet.
Changing Configuration Information
If you want to modify configuration information of a scanned system, there are several solutions:
- Using pre-install and post-install scripts
- Using boot scripts
- Integrate with a Configuration Management platform
In each case, you must import the scan as an appliance template.
Solution #1: Using pre-install and post-install scripts in the package mechanism: RPM and DEB package mechanism allows you to register scripts that are executed at various moments during the installation of the package. By packaging your middleware or application binaries as a native package you can register such scripts. These scripts are automatically taken into account as part of the machine image generation process. These packages can be added into the appliance template – either in a custom repository known by UForge AppCenter (in this case the packages are displayed as part of the repository and are added in OS Profile) or as part of a Project or My Software component.
Solution #2: Using boot scripts. UForge AppCenter allows you to add boot scripts in the appliance template. These boot scripts are executed the first time the migrated instance is provisioned. Boot scripts can also be registered to be run every time the instance is rebooted.
Solution #3: Integrate with a Configuration Management platform: There are many 3rd party platforms including Puppet, Chef, Ansible and Saltstack that can be used to configure middleware and application layers. Once a system has been migrated or a machine image generated from an appliance template, such configuration management platforms can be used for package update and configuration. You may need to include a bootstrapping mechanism to register the instance to the configuration management platform of your choice. This bootstrapping can be done using boot scripts (see solution #2).
Adding Security Patches
When a scan is imported as an appliance template all the native packages detected from the scan are compared with the UForge AppCenter package repositories. UForge AppCenter will immediately inform you whether new package versions are available for your scan report. Using the “appliance update” feature, a graph is displayed showing you all the available updates and allows the user to update the appliance template to the latest available packages. Once the appliance template has been updated, the user can then generate the machine image and register the machine image on the target environment. The migrated instance will have the latest package updates.
Of course this is not the only way to update a migrated system. The administrator can update the live system using the standard operating system update mechanism. Depending on the operating system this will be yum, apt, yast etc. The administrator can run this update manually, or add a boot script in the appliance template that carries out the update during first boot.
This allows the administrator to decide to use other configuration management platforms (Puppet, Chef, Ansible, Saltstack, BMC Bladelogic to name a few) to manage such updates. For some of these configuration platforms though, you will need to add a boot script as part of the appliance template to bootstrap the running instance with the configuration management platform.
Changing the OS Version of Middleware
Native packages, middleware and application software can be changed or swapped out; and the user can use the appliance update mechanism to determine if any package updates are available that can be applied prior to generating and migrating the workload.
Note
Changing the operating system for example from CentOS to Ubuntu is not supported.
For a list of supported OSes for Migration, see the table in Supported Operating Systems.
Major OS versions, for example upgrading from CentOS 5.0 to CentOS 6.0 is not supported automatically, though as we have the complete list of operating system packages from the scan, a new appliance template can be constructed with the new operating system version.
This process can further be automated by using the command-line tool hammr (see hammr.io). Hammr allows you to create identical machine images from a single configuration file (in JSON or YAML). For more information refer to the hammr documenation.
Qualification of any middleware and application software is strongly recommended.
Modifying the Scan Overlay
Note
This section only applies if you performed a scan with overlay.
When you import a scan as an appliance template, the overlay created as part of the scan process is registered as a My Software component. This My Software component is added to the appliance template.
The My Software component created from the overlay contains two archives. The first includes all the native package meta-data changes (permissions, ownership changes) and data changes (due to configuration modifications through the lifetime of the live machine). The second archive includes all files that are not part of any native package.
To modify a file in this overlay, you need to download, extract, modify and re-upload it to MySoftware once the changes have been made.