Deploying a Machine Image
Note
Currently, Linux machine images published on Amazon, OpenStack, Cloudstack and Microsoft Azure can be deployed from UForge. You can deploy a Windows based appliance only to Amazon and Azure. Deploy for Azure Stack is not supported.
You can only deploy a machine image if you have AMP installed. For more information on installing AMP, refer to the official Cloudsoft AMP documentation
The credentials to deploy a machine image are those used to publish it. For Amazon, only full accounts can be used, trial accounts are not supported for publishing images from UForge.
Pre-requisites
Check the following before starting your deployment.
For Windows:
Check that there are no pending Microsoft updates when you scan the source system for deployment.
For Windows Server 2008R2, you need to upgrade WinRM to 3.0 on the source machine before scanning.
For Windows deployments to Azure, do the following on the source machine before scanning:
Edit Windows Firewall rules as follows:
- Enable the
Windows Remote Management (HTTP-In)rule.- Define
local addressas “Any”.Launch command prompt as administrator and run the following WinRM commands:
winrm qc
winrm set winrm/config/service/auth @{Basic="true"}
winrm set winrm/config/service @{AllowUnencrypted="true"}
For Amazon, a Windows image with
Run Sysprepenabled in its template configuration is not supported for deployment. You should uncheckRun Sysprepoption in Install Profile, when you generate the image to deploy.For Azure, a Windows image with
Run Sysprepdisabled in its template configuration is not supported for deployment. You should checkRun Sysprepoption in Install Profile, when you generate the image to deploy.Note
For all deployed Windows virtual machines, if WinRM service is not enabled by default, then it will be activated during the deployment process.
Deployment Procedure
If not already done, create an account for the target environment. For more information, see Managing Cloud Accounts.
Go to the appliance and click the
Machine Imagespage. If you have not generated a machine image, you will need to do so as described in Generating a Machine Image.Click on the arrow pointing to the right to publish your image.

Following the instructions, choose the account and fill in any additional information required.
Warning
If your appliance has any elements such as passwords that must be set up by the user or licenses accepted at installation, you will see a warning when you publish the image which indicates
This image requires additional user interactions at startup(as shown below). In this case, you will not be able to use the deploy feature.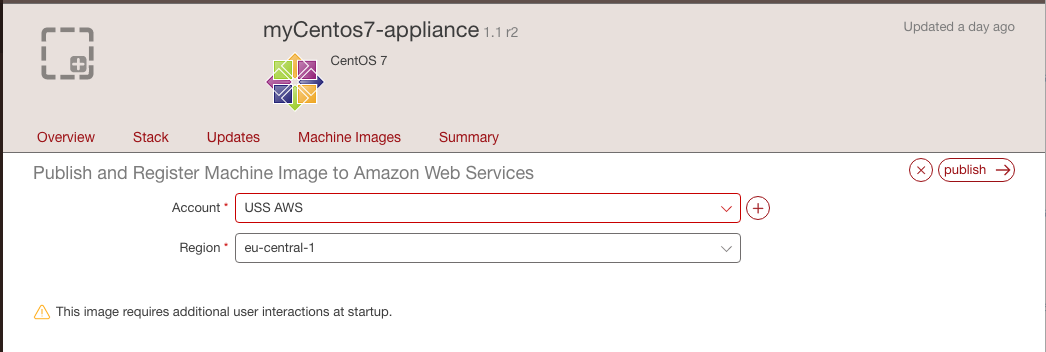
- Click
publish.Note
Publishing an image will be billed to the user account.
The publication will take a few minutes to complete (depending on the size of the image and the network connectivity between UForge and the target environment). The publication progress is shown. At the end of the publication, the machine image has been published by UForge to your target environment.
Under
Published Machine Images, next to your appliance, you will now see the deploy (play) icon. In order to deploy your machine image, click on this icon.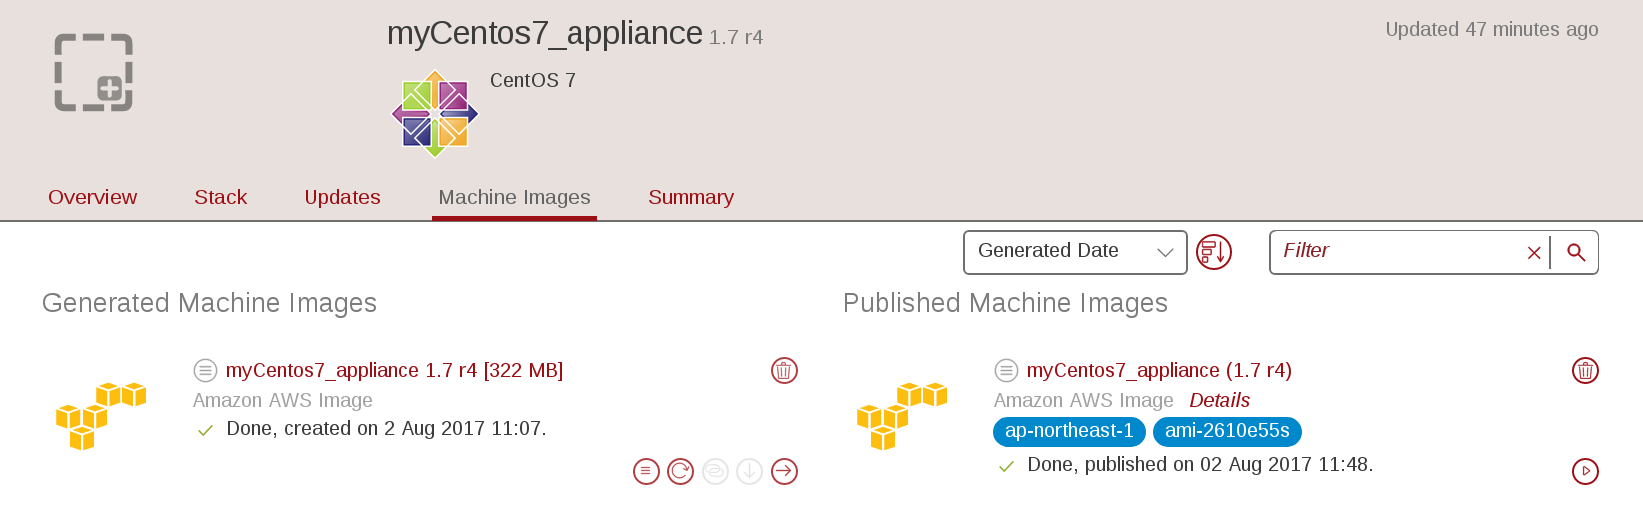
In the deploy view, enter the name of the deployment. Click on
deploy. This will connect to cloud platform and launch your machine image instance. Once deployed, a green button will appear under theStatuscolumn.For Linux images, you will need to input the
Instance Name,Minimal number of coresandMinimal RAMvalues.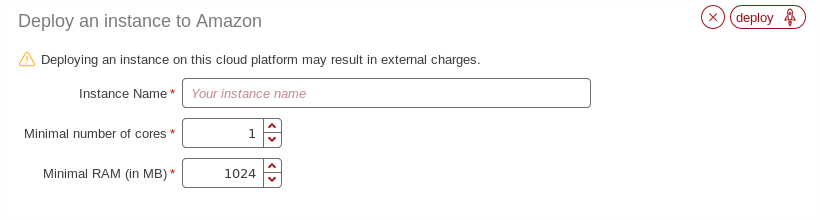
For Windows images, you will need to supply an additional
User nameandUser passwordfor an administrator account to be used forWinRM.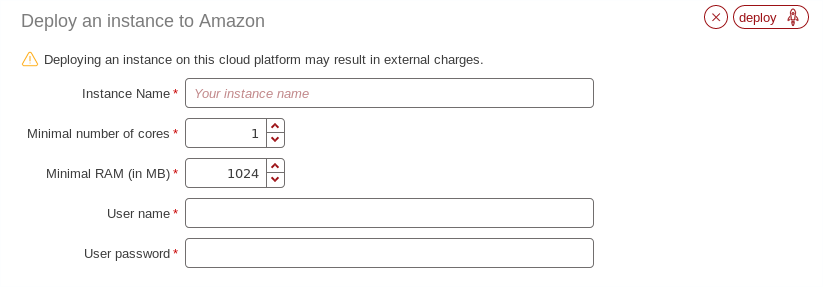
Note
When deploying a Windows machine image to Azure, you cannot use
AdministratororGuestas theUser name.Warning
Windows Evaluation Editions are not supported
From the
Deploymentspage you can see the instances deployed and their status. If the status is green it is up and running. If it is red, there has been an issue during deployment and/or it is stopped.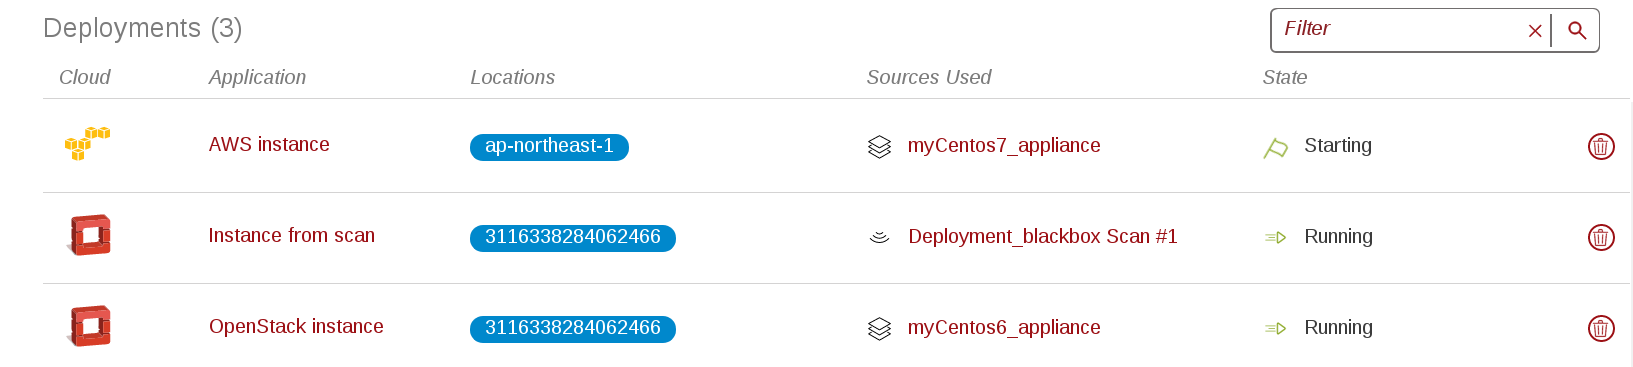
Note
Using this procedure, all deployed Linux virtual machines will have ssh port (22) open in their security group. All deployed Windows virtual machines will have RDP port (3389) and WinRM ports (5985, 5986) open in their security group.
Note
It may take a long time for a Windows virtual machine deployed to Azure to be provisioned.
Note
Currently, deployment of a Windows virtual machine from a published
Diskis not supported. For more information on publishing of Windows machine images, see Publishing a Windows Image to Azure Using Migration.
- To stop a deployed instance, click on the delete (garbage) icon. This will remove it from your cloud.
Warning
Terminating an OpenStack deployment may fail due to a known issue in AMP. Click again on the delete (garbage) icon to work around the issue.
Listing Deployed Machine Images
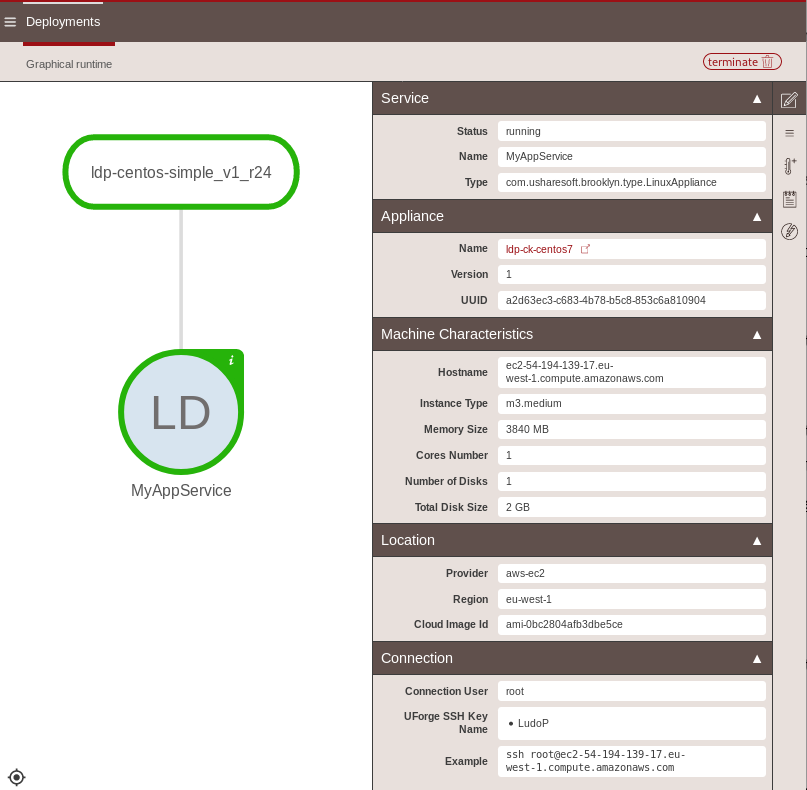
In order to view a list of the deployed machine images, go to the Deployments tab. A window similar to the following will appear.
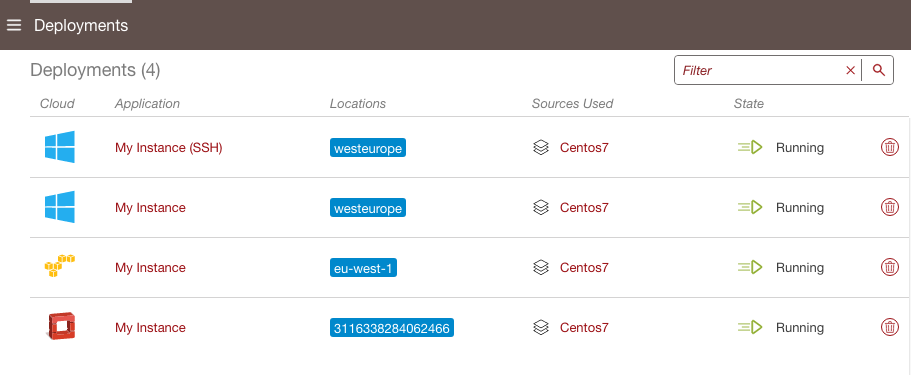
From this window you can see the cloud platform the published machine image was deployed to, the name of the deployed instance, the location of the machine image published, the source machine image (Appliance or Scan) and the state of the deployed instance on the cloud platform.
Note
If you click on the delete (garbage) icon, this will stop your deployed instance and remove it from your cloud.
If you click on the application name you will see the details of the instance that has been deployed, including the name of the instance and the Hostname or IP address of the machine and the user name and the SSH key (if any). An example code will also be given to connect to your instance.