Managing the Project Catalog
A Project Catalog is a collection of software components that are available for UForge users to use when building their server templates. A project is one software component. A project includes files, binaries or native packages and may have an EULA (End User License Agreement).
Each organization within the UForge platform has a project catalog, and each member of the organization has access to the project catalog, allowing them to add projects to their appliances. The contents of the project catalog can be updated and managed by administrators, in order to be adapted to the users of the organization. As the administrator, you can:
- add new projects to the catalog
- update existing projects to the catalog
- mark a project obsolete
- delete a project
You can also create custom OS profiles to include specific packages to an existing (standard) OS profile. See Creating Custom OS Profiles with UI.
Adding a Project
To add a new project:
Under the
Administrationtab, clickProjects.Click on
add projectin the top right hand.Note
Projects are associated with a specific version of operating system. If a project supports more than one version of operating system, then you must re-create a new project for each operating system version. To automate the way projects are added and maintained, use the UForge APIs (for example to add the same project to multiple operating systems).
Fill in the mandatory information including:
- Name of the project
Note
If you are creating a project with specific VirtIO drivers which will allow users to publish Windows images to KVM on Red Hat Linux, then the name must begin with
UForgeWinDrivers.
- Version
- Project tag
- Category
- Maintainer
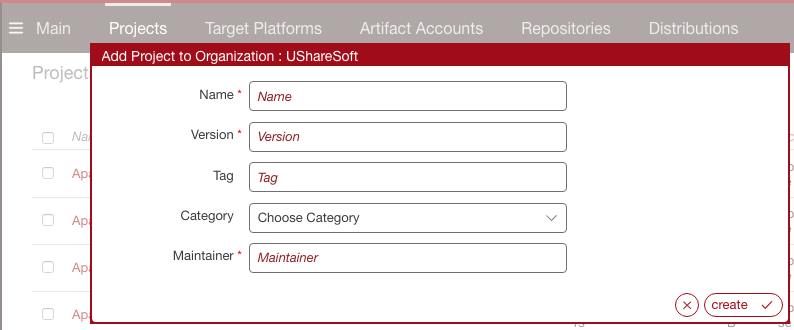
Click
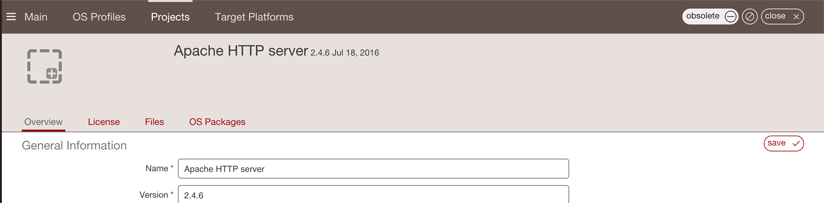
create.Optionally, you can add the following meta-data on the
Overviewtab:
- a logo for the project
- website information of where the project came from
- description
Optionally, you can restrict the distribution or target format that the project applies to, from the
Restrictionspage. The restriction rule is set as a regular expression. For more information, refer to Restricting Projects for OSes and Formats.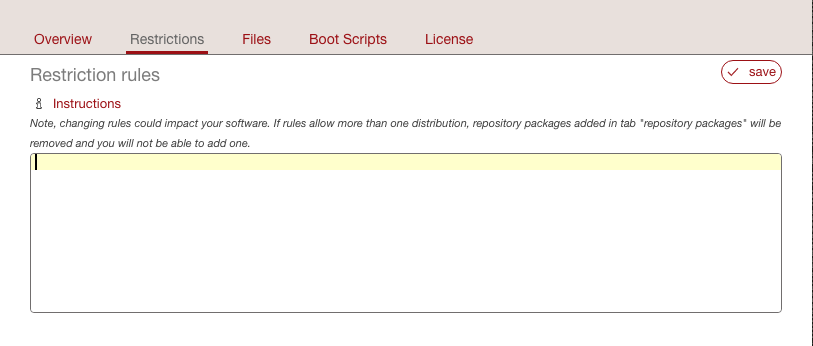
You can add files by clicking
upload. If you want to add many files, you can create a folder and add files within the folder.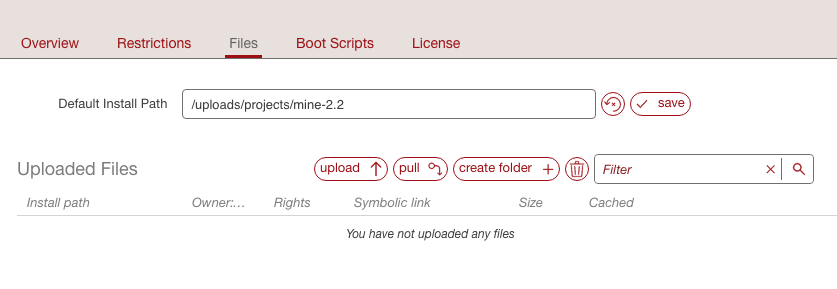
If you want to include files from a remote location click on
pull. Select how the file should be retrieved and if it should be cached.
You can add a license (optional). To do so,
- Go to the
Licensetab- Select the license type from the drop-down menu.
- Click
upload.- Select the file and click
open.You can add a bootscript (optional) on the
Bootscripttab.
- Enter the name.
- Select the type. If you select first boot, then the boot script will be launched only once, the first time the instance is launched. If you select every boot, then the boot script will be launched every time the instance is rebooted.
- Set the boot order.
- Enter the boot script.
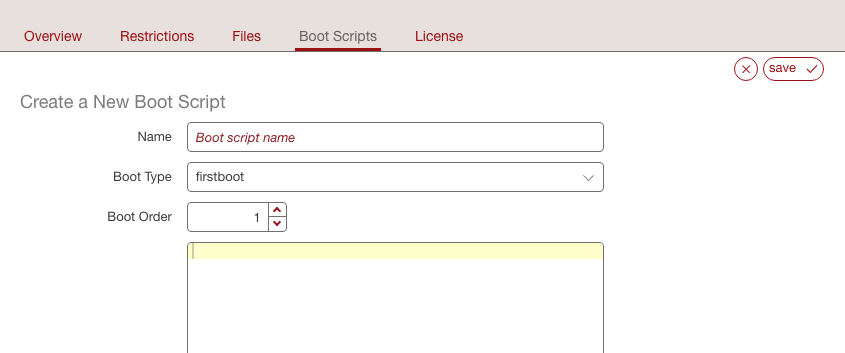
Click
Save.
Restricting Projects for OSes and Formats
Under Projects you can restrict the usage of a project based on a distribution name, family, architecture or for a specific machine image format.
To set restriction rules for a project:
- Under the
Administrationtab, clickProjects. - Select the project you want to modify.
- Go to the
Restrictionstab. Enter the restriction rule. The restriction rule is represented by a logical expression with formatObject#field=valueorObject#field!=value, where: objectis eitherDistributionorTargetFormat- for
Distributionfield isfamily,pkgType,name,versionorarch. Theversionmust be a major version. - for
TargetFormatfield isnameortype valueis the value you want to match with the fields. For example,CentOSfor Distribution name,linuxfor Distribution family,x86_64for Distribution arch,VirtualBoxfor TargetFormat name,cloudfor TargetFormat type.- logical operator is
||for OR and&&for AND - carriage return is not authorized
- Go to the
- Under the
For example, if the project is designed only for distributions CentOS 7 x86_64 or Debian 8 x86_64, or for TargetFormat with type virtual, then you would note the Restriction rule as follows:
(Distribution#arch=x86_64 && ((Distribution#name=CentOS && Distribution#version=7) || (Distribution#name=Debian && Distribution#version=8))) || TargetFormat#type=virtual
Note
If your project is limited to a certain target format and you generate an image in another format, your appliance will be generated but the project will not be part of the final image.
- Restriction rule values:
By using the command-line tool hammr, you are able to retrieve available distributions:
$ hammr os list --url https://uforge.example.com/api -u username -p password
- Where
Distributionfields possible values are: name: the value listed in the Name columnversion: the value listed in the Version columnarch: the value listed in the Architecture columnfamily: can be one of the followinglinux,unixorwindowspkgType: can be eitherapplication/x-rpmorapplication/x-debian-package
By using the command-line tool hammr, you are able to retrieve available machine image formats:
$ hammr format list --url https://uforge.example.com/api -u username -p password
- Where
TargetFormatfields possible values are: name: the value listed in the Builder Type columntype: can be one of the followingcloud,container,physicalorvirtual
Updating a Project
UForge provides the default projects for the OSes provided.
To modify the projects:
- Under the
Administrationtab, clickProjects.- You will see a list of all the projects that are part of the org.
- Click on the project you wish to edit. At this stage you can change any of the meta-data, restrictions and files uploaded.
Deleting a Project
When deleting projects from the catalog, it is important to understand that you should check that no appliance templates are using the project you wish to delete (otherwise this may break generating a machine image for the appliance template).
Note
If an appliance template is still using a project, you can remove the project from the catalog by marking it as obsolete. This does not delete the project contents, however users cannot use the project for new appliance templates. See Marking a Project as Obsolete for more information.
To delete the project:
Under the
Administrationtab, clickProjects.You will see a list of all the projects that are part of the org.
To delete the project you can either:
- Click on the
deleteicon at the extreme right-hand side in the table for the project item.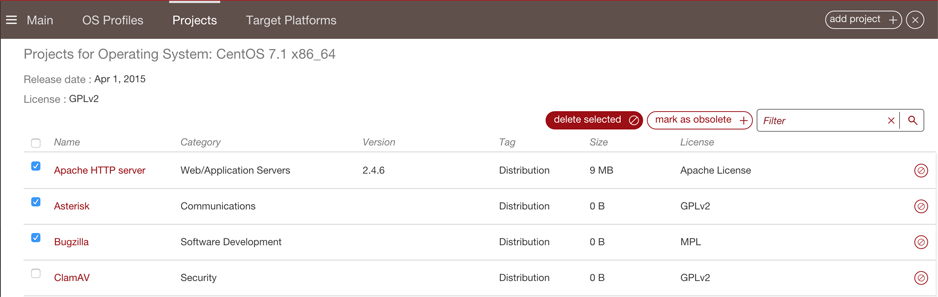
- Click on the project item to edit it, then click on the
deleteicon at the top right-hand side of the project edit page.
Marking a Project as Obsolete
Another way to remove a project from the project catalog is to mark the project as obsolete. This ensures that any existing templates that use the project can still generate images correctly, however the project is no longer accessible in the catalog for new appliance templates.
To mark a project as obsolete:
- Under the
Administrationtab, clickProjects.- You will see a list of all the projects that are part of the org.
- Click on the project to edit it.
- Click on the
obsoleteicon at the top right-hand side of the project edit page.